|
[QODBC-Desktop] Accessing QuickBooks data remotely via QODBC v9 and above using RDS
Posted by brad waddell on 12 March 2009 05:21 PM
|
|
|
Note: VB Demo is deprecated.Please refer to How to use the QODBC Test Tool for testing Note: As an alternative to Remote Data Sharing (RDS), we suggest you use QRemote. Using QuickBooks data remotely via QODBC.
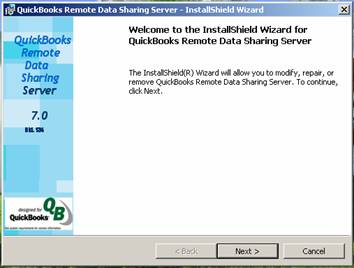
Note: QODBC can talk to a copy of QuickBooks running anywhere in the world over the Internet or a local area network using the Intuit Remote Data Sharing Server. This feature is built-in and requires no additional charge. If you are using an older version of QODBC v6, 7, or 8, see the previously used How to Setup QODBC Remote using Remote Connector. About RDS ServiceQuickBooks Remote Data Sharing (RDS) is software that allows an integrated application to communicate transparently with QuickBooks 2009 company files on another machine in a network (typically a LAN). The communication is transparent because the application is unaware that it is accessing QuickBooks remotely. The RDS consists of two components: the RDS server and the RDS client. The RDS server must be installed on a machine on which QuickBooks is installed. (QuickBooks need not be running, depending on the access mode selected at the RDS server.) The RDS client must be installed on the machine that is running your application and QODBC. Note: The RDS Server and Client application now work for 64-bit system users. Just download them from the link below. RDS ServerRDS Server Installation1. Download the RDS Server installer (RDS6ServerInstaller.exe) 2. Install RDS server software and set it up on the QuickBooks machine. (1) Double-click the RDS Server Installation icon and install.
(2) Click Next, Install, and Finish to complete the RDS server's installation.
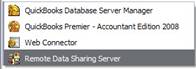
[Note: You HAVE TO BE USING v7.00.x for RDS to work. Also, if the installer says it is installing 2. x, ignore that and check the version when it runs. It should say v7.00.x in the Window caption when running. If it does not, it is the wrong version.] (3) From your Start>All Programs>QuickBooks icon, double-click on the Remote Data Sharing Server to launch the Control Panel.
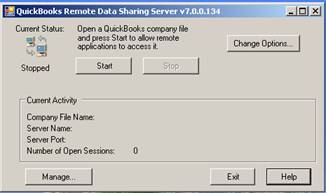
Functions of the RDS Server Control Panel
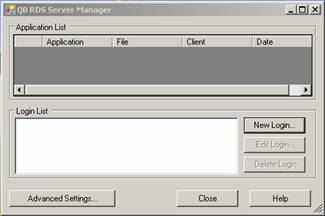
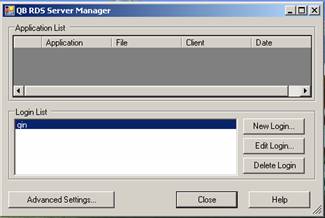
1. Start the RDS server by clicking the Start button. Clients come through the RDS server remotely to access the QuickBooks data when the server-side information is configured, and the service is started. 2. RDS services can be terminated by clicking on the Stop button. 3. The default company files for remote access are set to the currently open file. To select specific company files to be used remotely, use the Change Options button. 4. At least one RDS login and password must be created at the RDS server for use by remote applications. This is done through the Manage button. Configuring RDS1. Click Manage from the control panel and New Login to set up user information
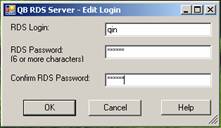
2. Add a user login name and password at least six characters long and click OK.
The username has been added to the Login List, which can be edited or deleted anytime. Next, click on the Advanced Settings button.
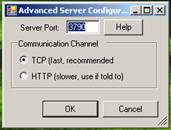
3. The next step is to define the Server Port and Communication Channel of the RDS Server. The default port of 3790 is chosen in this example (if other applications already occupy it, users can choose another port that is not used on the machine). TCP has been selected in Communication Channel. Click OK to save settings. Click Close to exit out of Server Manager and return to the Control Panel
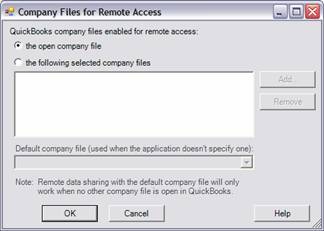
4. Click on Change Options to specify the mode in the company file that will be accessed.
If you specify the open company file, then QuickBooks must run on the same machine as the RDS server, and a company file must be available. All remote applications must then use whatever company file happens to be open. Suppose you specify the following selected company files. QuickBooks does not need to run in that case, and remote applications can access any company files you add to the company files list. Click OK to close the dialog box.
5. The final step of setting up the RDS server is connecting to the QuickBooks company file. The open company file mode had been selected, so QuickBooks must run before RDS Server can start. [Note: You must be logged into QuickBooks as Administrator before starting RDS]
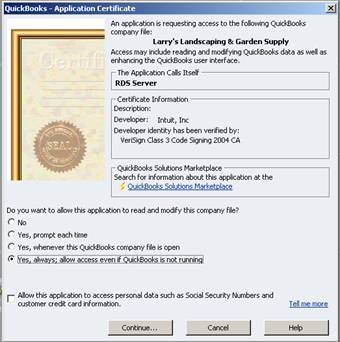
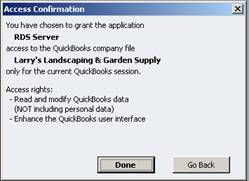
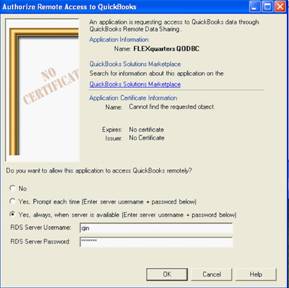
If the RDS server is being run for the first time with the QuickBooks company file, permissions must be granted by QuickBooks for this access. Click the RDS Start button, and a QuickBooks dialog box like the one shown above will display. Select Yes, always; allow access even if QuickBooks is not running the option, click continue, and then done.
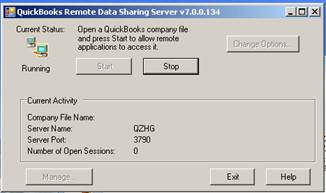
RDS Server is now waiting for the RDS Client to access it. RDS running with no access to the client:
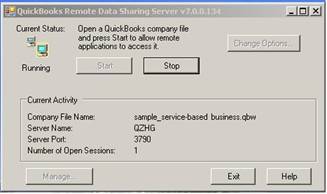
RDS running with access to the client:
RDS ClientNote: Now that the RDS server with QuickBooks is set up, the Client side needs to be configured to talk to it. On the Client side, you have an ODBC-compliant application that needs to access the QuickBooks company file, which will require a "bridge" to talk to the data, besides just having a connection between the two computers. QODBC provides a standard ODBC interface that allows thousands of ODBC applications to access QuickBooks data and communicate with it. RDS Client Installation1. Download the RDS Client installer (RDS6ClientInstaller.exe) 2. Install RDS client software and set it up on the machine that runs the application that will access the RDS Server with QuickBooks. Follow the prompts during the installation. Click Finish to complete the installation. [Note: If you receive any errors regarding the.Net Framework 2.0 during installation or running the Client RDS, see the end of this document for possible solutions]
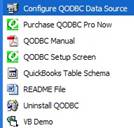
QODBC Installation and ConfigurationInstallation of QODBCDownload QODBC and run the QODBC.exe. Follow the prompts during the installation. If you have purchased QODBC, enter the CDKey you were issued on the Activation screen when prompted for. If you are evaluating the product, Click next and finish following the screen prompts and then Click Finish to complete the installation. Configuring a Data Source (DSN)1. Now that all the components have been installed for Remote Data sharing, you must configure QODBC and set up a DSN (Data Source Name). The easiest method is to go to Start>All Programs>QODBC Driver for use with the QuickBooks icon, select Configure QODBC Data Source from the drop-down, and double-click on it. This will launch your ODBC Administrator
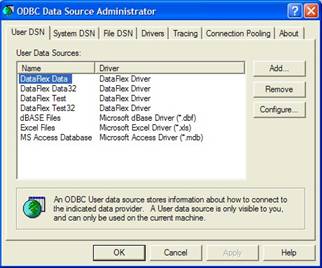
2. Select Add on the User DSN Tab to create a new Data Source
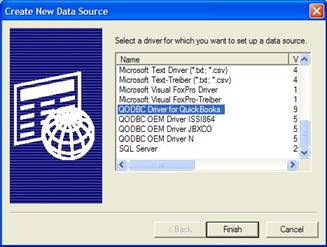
3. Select QODBC Driver for QuickBooks and Click Finish and the following QODBC setup screen will launch.
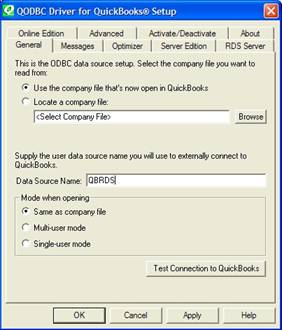
4. On the General Tab, type in a name for your new DSN and Click Apply
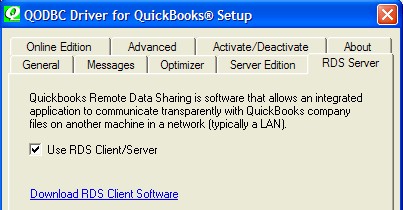
Note: On the RDS Server-side, "Use the company file that's now open in QuickBooks" was selected to the same default used here. If you named files on the Server side to be opened without QuickBooks running, you need to select "Locate a company file" then click on browse and find the company file you intend to use. If you have multiple company files, individual DSNs will need to be set up for each company file, and each will be given a unique DSN name and path. [Note: The location of the company file in the QODBC setup screen should be the full (local) path as it appears on the server itself, not as it appears on the remote computer (ie: do not use a UNC path). ] 5. Switch to the RDS Server Tab. Check Use RDS Client/Server box, then Click on Apply and OK. The new DSN is now configured for remote use. If the RDS Server Tab is missing, then please refer to the following:
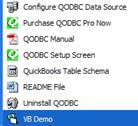
Testing the Remote Connection to QuickBooks1. Go to Start>All Programs>QODBC Driver for use with QuickBooks icon, select the VB Demo is, on, and double Click which will launch the VB program.
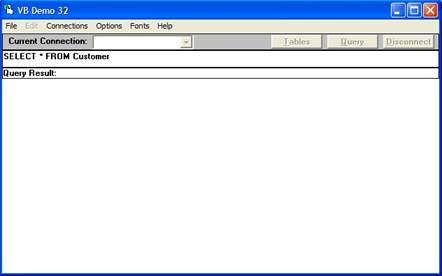
2. Click on Connections>Add New Connection.
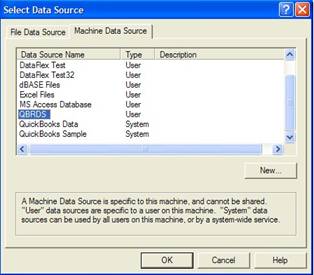
3. From the Select Data Source Machine Data Source Tab, highlight the remote DSN and Click OK.
If the RDS Server runs and the VB Demo tries to access the QuickBooks data, the following Integrated Applications screen from QuickBooks will pop up. Check "Yes, always, when the server is available" and input the RDS Server Username and Password.
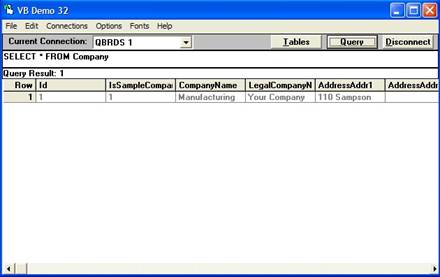
4. Your Current Connection should now show the selected remote DSN. You are now ready to connect your application remotely using the QODBC DSN configured for remote QuickBooks access! Click Disconnect and close the VB Demo application. The default SQL statement in the VB demo is SEL. Delete Customer, delete this statement, and type in SE, LECT * FROM Company, and Click Query which should return a record.
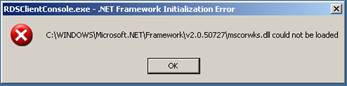
TroubleshootingMicrosoft .NET Framework 2.0 ErrorThe RDS Client needs Microsoft's.N. I framework to run. If you receive any errors regarding g the.NET framework, you will need to install the latest server pack from Microsoft to correct the problem.
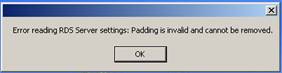
.NET Framework 2.0SP1 Download Page .NET Framework 2.0SP1 Download Link http://download.microsoft.com/download/0/8/c/08c19fa4-4c4f-4ffb-9d6c-150906578c9e/NetFx20SP1_x86.exe RDS Server Error
The information in the configuration files may have been corrupted. To remedy the problem delete all the configuration files in "C:\Documents and Settings\All Users\Application Data\ntuit\RDSServerv6" and reboot RDS Server to reset user information and services. [Note: Backup all the files before deleting them] QuickBooks Open Connection failed
The Reasons: Perhaps could be caused by the "DNS Server" being the RDS Client is inconsistent with the "DNS Server" of tsolutionrver. The solutions: Modify the DNS Server listed under your settings for your network connection to match. Ask your network administrator if you need help with this. | |
|
|