


|
[QODBC-Desktop] Using QuickBooks data remotely via QODBC
Posted by Rajendra Dewani (QODBC Support) on 21 December 2012 08:21 AM
|
|
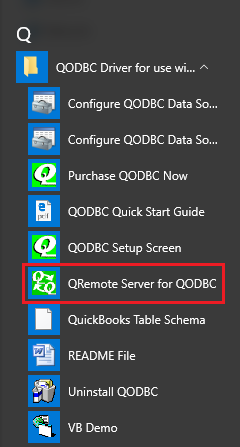
QRemote Tutorial: Using QuickBooks data remotely via QODBCAlso, refer to Accessing QuickBooks Data Remotely using QODBC & QRemote. (Video) QODBC has the ability to talk to a copy of QuickBooks running anywhere in the world over the Internet or a local area network. This feature is built-in into the licensed version and requires no additional charge. This feature can transfer data in an unencrypted fashion (plain text), or you can set up your encryption key to encrypt the data, which is preferable for transfer over the open Internet. To get this feature to work, install QODBC on the machine, which runs QuickBooks (the SERVER), and the machine you want to use the data from (the remote CLIENT). It does not matter if the QuickBooks data file is located on the SERVER machine or another location, but the best speed is attained if it is on the SERVER machine. QuickBooks on the SERVER Machine should be able to open the QuickBooks company file. Once this is done, a few simple settings in the driver setup screen are required to use this data remotely. Before testing remote capabilities, be sure you have tested basic QODBC functionality to ensure that QODBC can connect to QuickBooks and obtain data with this article. The tool we use to make this remote connection is called QRemote. QRemote is a bridge between remote applications and the QODBC Driver by communicating data calls between the two worlds using TCP/IP (Internet) protocol. QRemote has two components "QRemote Client Driver for QODBC" and "QRemote Server for QODBC." QRemote Client Driver (CLIENT): Allows applications to connect to QRemote Server and sends the Request to QRemote Server for Processing. QRemote Server (SERVER): Processes requested instructions from QRemote Client to QuickBooks using QODBC Driver talking to QuickBooks application SDK. Configuring SERVER Machine: Start "QRemote Server for QODBC" from the Windows start menu.
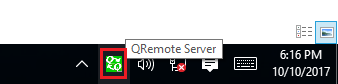
Double-click the QRemote Server icon "Q" from the system tray.
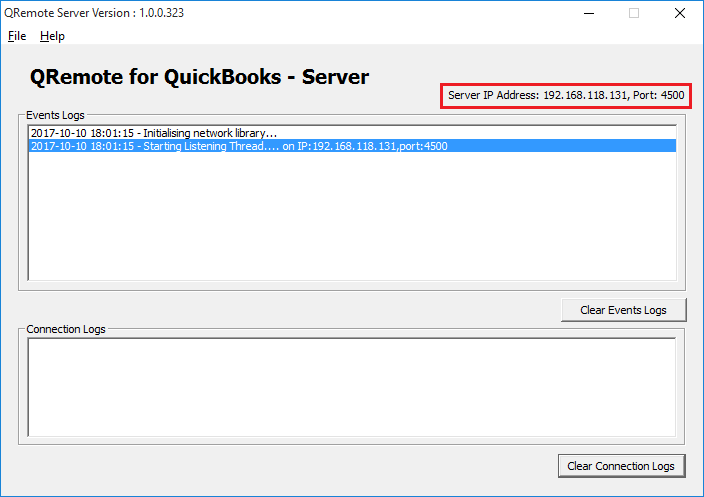
QRemote Server Main screen shows the IP address and port setup for the QRemote CLIENT to connect.
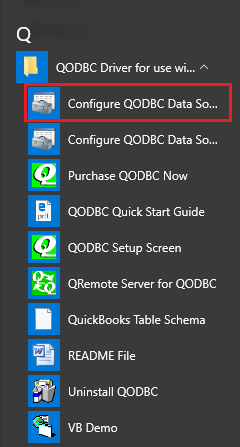
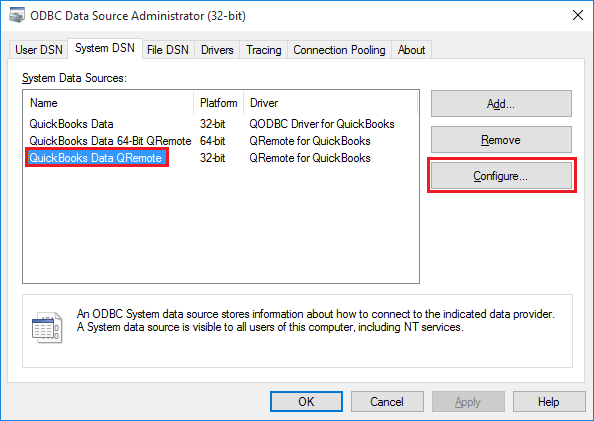
Note the IP address and Port number listed on the QRemote Server "Event Logs Window." Configuring CLIENT Machine: Select "Configure QODBC Data Source" from Windows Start Menu. (If your application is 64-bit, select "Configure QODBC Data Source 64-bit)."
Switch to "System DSN," Select the DSN "QuickBooks Data QRemote" Or "QRemote Data 32-bit". (For 64-bit DSN, "QuickBooks Data 64-bit QRemote" or "QRemote Data 64-bit")
Click Configure. This will bring the QRemote Client DSN Configuration. Fill in the following information Data Source Name: Name of your DSN entry - Do Not Change Under the QRemote for QuickBooks Client DSN configuration screen, Please fill in the following information · Server: IP Address displayed on QRemote Server · Port: Port displayed on QRemote Server · Encryption Key/Password: (By Default, Encryption Key/Password is set to "QODBC#QRemote$1". In case you want to change your Encryption Key/Password, You can configure your encryption key on QRemoteServer and use the same on QRemote Client DSN) · Encryption: (By Default, Encryption is set to Off. In case you want to use encrypted data transfer between QRemote client and QRemoteServer, You can configure encryption on QRemoteServer and use the same on QRemote Client DSN) · Remote DSN: select QuickBooks Data DSN from the list. (Make sure QRemote Server is running)
"QuickBooks Data QRemote" Or "QRemote Data 32-bit". (For 64-bit DSN, "QuickBooks Data 64-bit QRemote" or "QRemote Data 64-bit") Verify the QRemote Client connects to the server and the below-listed logs are logged in the event window of the QRemote Server at SERVER Machine:
For using QRemote over the Internet & with dynamic IP (Non-static-IP):You can make sure of services like Dynamic DNS (DDNS or DynDNS). It is a method of automatically updating a name server in the Domain Name System (DNS). Using Dynamic DNS, you will always be able to access your computer even if your IP address is dynamically assigned. You can refer to the below links for more details about Dynamic DNS & can implement it at your end. Note: When you use Dynamic DNS, You should use the Encryption feature in QRemote Client & QRemote Server. So your data transmission will be secure. Refer to: How to turn On/Off Encryption on QRemote
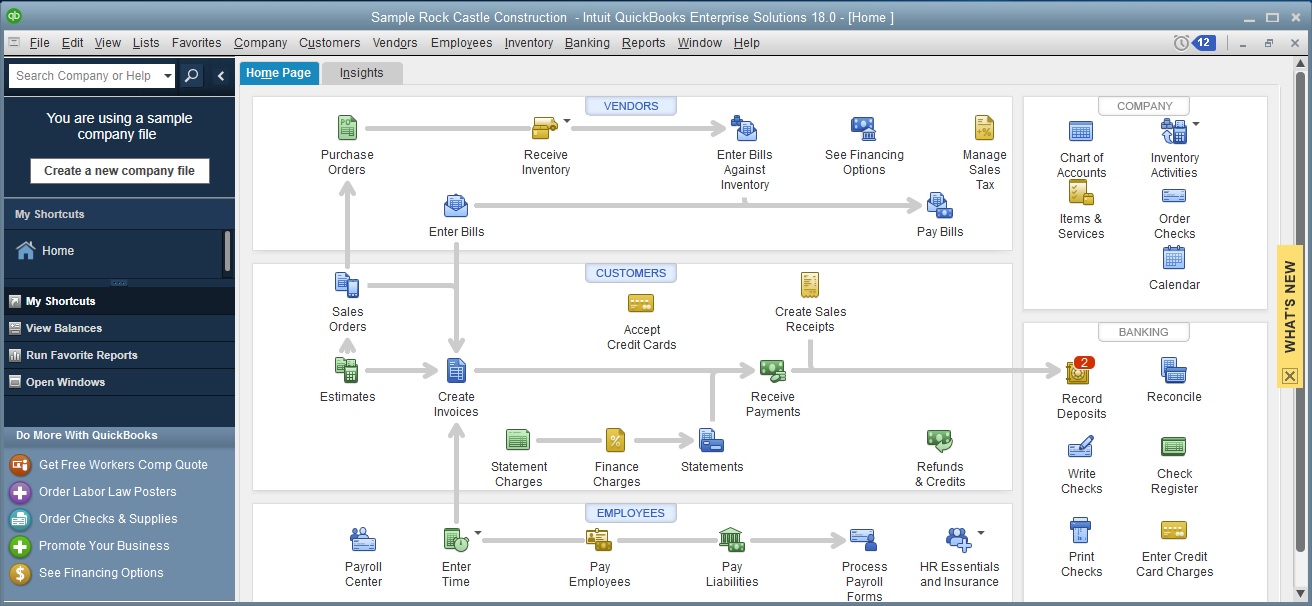
Connection to Remote QuickBooks/QODBC via Applications (32-bit) You may use 32-bit Applications like MS Access/Excel to connect to the Remote QODBC. In this example, we are using QODBC Test Tool Step 1 - Start QuickBooks to register QODBC Please keep QuickBooks running at SERVER Machine, Logged in as "Admin" under Single User Mode. QuickBooks is an accounting program that must produce trusted numbers that accountants can rely on. For this reason, they have created an interface to the QuickBooks application, which follows all of the business rules. This is what our product uses to access QuickBooks data. To get access to that data, your application (using QODBC/QRemote) must register with QuickBooks so that security access can be granted. To do this, you first need to run QuickBooks on your computer, log in as an Administrator, and open your company file (or one of the sample company files that came with QuickBooks)
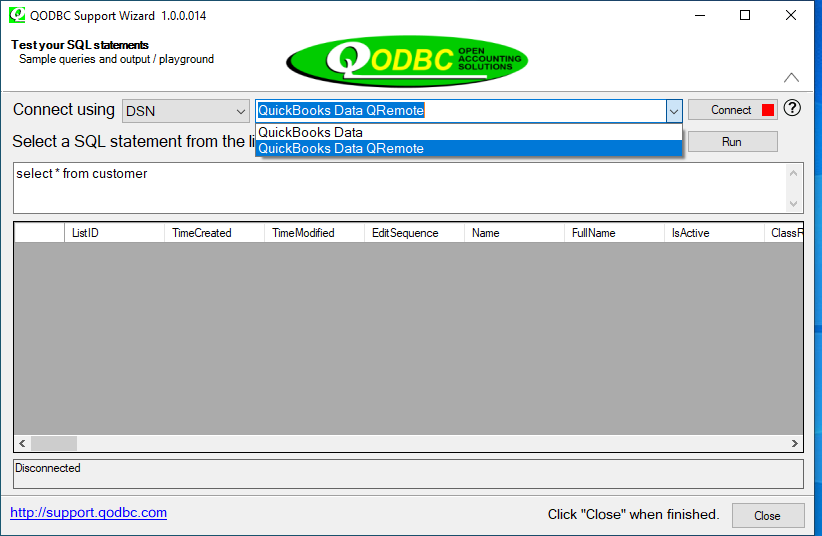
Step 2 - Running QODBC Test Tool Leaving your QuickBooks company file open, click "Start" and "Programs" and locate QODBC Driver for the QuickBooks program group.
Select the "QuickBooks Data QRemote" DSN from the dropdown list and click on "Connect" to establish a connection.
"QuickBooks Data QRemote" Or "QRemote Data 32-bit". (For 64-bit DSN, "QuickBooks Data 64-bit QRemote" or "QRemote Data 64-bit")
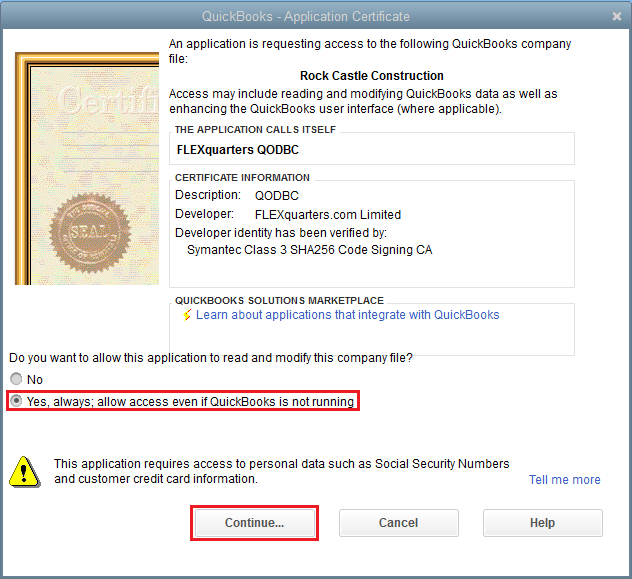
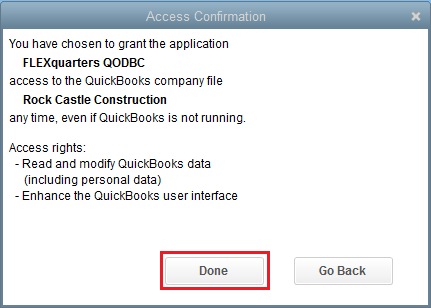
Step 3 - QuickBooks Integrated Applications At SERVER Machine, QuickBooks will request for Accepting Certificate for Data Access. When the driver starts, QuickBooks will ask permission for the driver to access your QuickBooks data. Answer "Yes, Always" to this, and the QODBC driver is added to the Integrated Application list. This will allow applications to integrate with QuickBooks data when QuickBooks is running on the desktop. There may be instances in which you want an integrated application designed to share data with QuickBooks to access QuickBooks files automatically, without user intervention. This might permit, for example, a particular application to run during the night when there is no other activity in the company file. Also, QuickBooks need not be running on the desktop for ODBC-compliant applications to access the data files while setting in this mode.
This will allow applications to integrate with QuickBooks data when QuickBooks is running on the desktop. Step 4 - Testing Your Connection CLIENT Machine: After the successful connection, you may notice the "Connect" button altered to "Disconnect" with a green indicator.
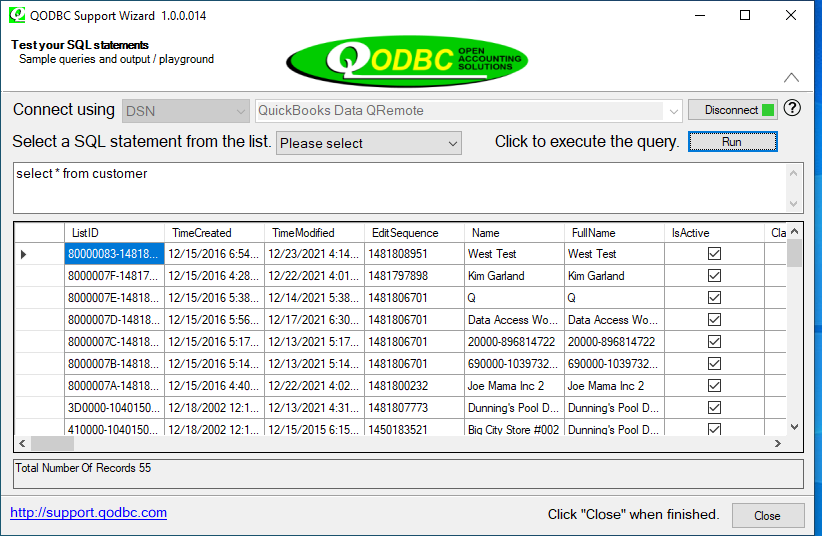
Click on the "Run" button.
Now that you have successfully established a connection to your QuickBooks data, it's time to type in your desired SQL query. For example, you can see the above default "SELECT * FROM CUSTOMER" or type in another table like stock by entering "SELECT * FROM ITEM INVENTORY." Click the "Run" button, and the requested query results will appear! In case you're wondering, the * in the select statement means all columns in that Table. Click on the "Tables" button to see a list of all the available QuickBooks tables. To disconnect, you can either select "connections" / "remove the connection" or Click the "disconnect" button. If you get an error, please search our FAQ Knowledgebase or post a support ticket to resolve the issue Click Here. If not, congratulations - you have created your first report from QuickBooks data and are ready to talk about your company data.
| |
|
|


QODBC and QuickBooks is a desktop-based application and cannot be run as a windows service. QODBC uses QuickBooks SDK, and QuickBooks SDK uses QuickBooks Application to get data from company file.
QuickBooks SDK requires an active desktop session (someone to be logged in) to the machine because QuickBooks is a desktop-based application.
QRemote Server is not a service-based application and is a desktop-based windows application cannot be run as a service.