|
[QODBC-Desktop] How to Install QODBC v14 and above on a 64-bit Windows
Posted by Rajendra Dewani (QODBC Support) on 14 April 2014 03:37 PM
|
|
Instruction:In QODBC v12, we added a new component named QRemote to solve the 64-bit application support issue. This article is going to show you how to install QODBC v14 or higher on a 64-bit system. ( Follow the same installation steps for QODBC v12 & QODBC v13) You can download our latest QODBC from here ODBC Data Source Manager 32-bit :First, you should locate a 32-bit ODBC manager. There are two ODBC managers on a 64-bit system, one is for 32-bit, and the other is for 64-bit. Using a 32-bit ODBC manager to create and configure ODBC Data Source would be best. The 32-bit ODBC manager can be found at C:\windows\sysWOW64\odbcad32.exe.
Open 32-bit ODBC manager:
Go to the System DSN window:
QODBC Driver for QuickBooks is a 32-bit Driver, so it gets listed in the 32-bit ODBC manager. ODBC Data Source Manager 64-bit :The 64-bit QODBC manager can be found at C:\Windows\System32\odbcad32.exe
Open 64-bit ODBC manager:
Go to the System DSN window:
This is an ODBC manager for 64-bit data sources, so you will not be able to find QODBC Driver for QuickBooks Install QODBC v14 or above
Run the QODBC install program as Administrator:
Follow the steps of the install wizard:
Make sure you select the right regional version. It should be the same as the company file you want to access:
If you had activated QODBC with a license key before and did not deactivate it, then you can skip the CDKEY input step. QODBC will still use the old license:
Then wait until the QODBC installation is done:
You can check the ODBC managers for new DSN entries when the installation is done. Goto ODBC Manager 32-bit: Click Start -- > All Programs -- > QODBC Driver for use with QuickBooks -- > Configure QODBC Data Source.
If your application is 32-bit, you can use "QuickBooks Data." There is a new 32-bit DSN named "QuickBooks Data QRemote." You may configure it to point to the remote machine to access QuickBooks Data remotely.
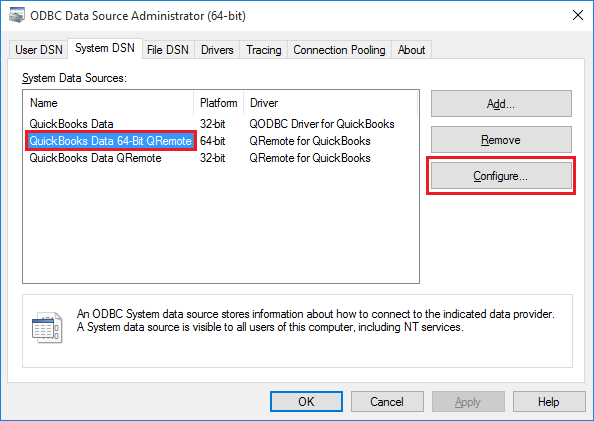
Go to ODBC Manager 64-bit: Click Start -- > All Programs -- > QODBC Driver for use with QuickBooks -- > Configure QODBC Data Source 64-bit.
Now you see that there is a new 64-bit DSN named "QuickBooks Data 64-bit QRemote" or "QRemote Data." When you use 64-bit applications, you can use this DSN to access QuickBooks via QODBC and QRemote. Please refer to this article for more information about how to use QRemote: How to Configure QODBC to Work With 64-bit Applications Also, Refer Connecting QODBC Driver to QuickBooks for the First Time (Video) How to set up QODBC Driver to auto-connect to QuickBooks. (Video) | |
|
|