|
[QODBC-Desktop] How to create or configure a QODBC DSN
Posted by brad waddell on 12 March 2009 05:21 PM
|
|
Launch QODBC Data Source ConfigurationLocate the QODBC Driver for the QuickBooks program group on your desktop. Click on the Configure QODBC Data Source icon to create or configure a QODBC Data Source Name (DSN).
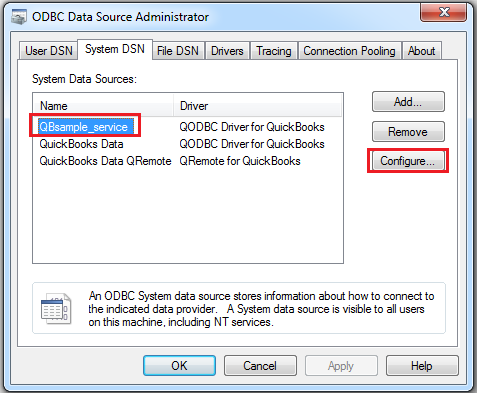
Create a New DSNClick on the System DSN tab to create a DSN that both Windows applications and services can call. Click on the Add button to create a new DSN.
Select the QODBC Driver for QuickBooks option and click on the Finish button.
Configure the Created DSNClick on the Locate a company file radio button to associate the QuickBooks company file with being used by your DSN. Click on the Browse button to locate your company file.
Choose your QuickBooks company file.
Enter the name of your new DSN and click OK.
The new QODBC DSN has now been created. To modify the DSN anytime in the future, use the Configure button.
Also, Refer: How to start the QODBC Setup Screen of a specified DSN Tags: QuickBooks start, QuickBooks autostart, QuickBooks startup, QuickBooks Connect | |
|
|